Search This Blog

Saturday, August 14, 2010

Krys' Protein Packed Blueberry Muffins

Howdy, ya'll (That's my Paula Deen for the morning)!

Sorry for nothing new and/or exciting yesterday. We ended up going out to eat, which triggered another gallbladder attack, so I was down for the night. Can't wait to get this blasted thing out!

I've been looking at several Blueberry Muffin recipes, and wondering how I could make them even better....and I think I've found it! Below you will find the recipe for my loaded with protein and super tasty blueberry muffins. I hope you like them! :)

***************************

Krys' Protein Packed Blueberry Muffins


Ingredients:

  • 2 cups of Vanilla flavored whey protein powder (I use Optimum Nutrition Vanilla Ice Cream)
  • 6 ounces of cream cheese: 4 ounces cut into 12 equal sized cubes, and 2 ounces softened
  • 3/4 cup of sweetener (I used Ideal)
  • 3 large eggs
  • 2 teaspoons of baking powder
  • 4 tablespoons of butter, melted
  • 2 teaspoons of cinnamon
  • 1/2 cup heavy whipping cream
  • 1 teaspoon of vanilla extract
  • 3/4 cup of fresh blueberries

Preparation:

Remember what your momma taught ya! Combine your dry ingredients together, then your wet, then bring it all together. 

In a LARGE bowl, add in your 2 protein powder, sweetener, baking powder, and cinnamon. Mix together, and set aside. 

In a smaller bowl, add your softened cream cheese. Add in your 3 eggs, and whisk together until fairly smooth (there will be small clumps, but that is ok). Once combined, add in your melted butter, heavy cream, and vanilla extract. Whisk everything together again, making sure everything is fully combined. Set aside.

Take your remaining 4 ounces of cream cheese, and cut it into 12 equal sized cubes. Stick back into the fridge until ready to use. 

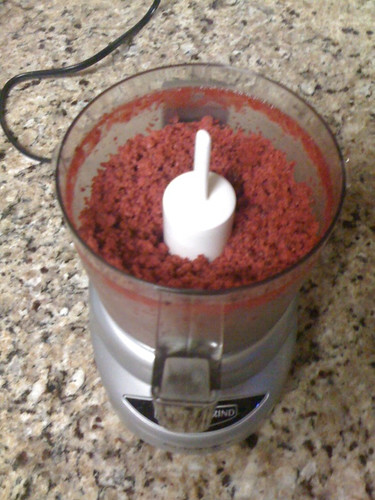
You can do this last step, or you can skip it. I grew up on boxed blueberry muffin mix (sorry, mom!). You know..the kind with the little can of the teeniest, tiniest blueberries you've ever seen? That. So...I don't deal with fresh blueberries well because they are so big and tart. So...I toss my 3/4 cup of blueberries in my little food processor with 1 additional teaspoon of sweetener and give them a few pulses. Still good sized chunks, but not as big as the entire blueberry would be, and just a touch of sweetness.  Doing this also allows them to spread further through the batter. Again, this step is completely optional, and you add in your blueberries however you like them! :)

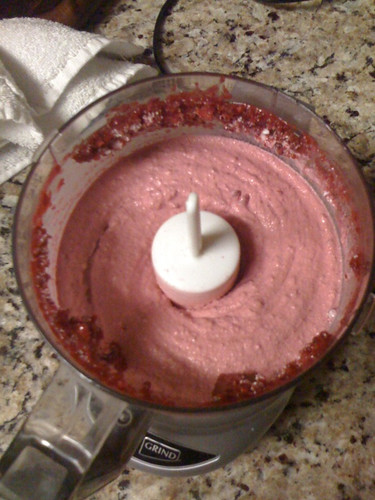
Ok...time to make some introductions! Wet, meet dry! Add your wet ingredients to your dry. This will for a pretty thick batter, but don't worry.  Next, add in your blueberries. If you blitzed them like I did, you should see something kinda sorta like this ;)
Prepare your muffin tin - either with paper liners, or a dab of baking spray, or butter, or whatever you like to use. I love the foil and paper muffin cups, but turns out I only had 4 :(

Fill the muffin cups about 1/3 full. You'll want to use about half of your batter to do this. Gotta leave room for those cream cheese cubes that you were probably thinking I forgot about and that you cut up for nothing! :)

Once partially filled with the batter, set 1 cube of cream cheese in each muffin cup. You'll want to set it in whatever way makes it stick out the least - we have to be sure to cover these guys completely before baking. 

A little extra goodness in the middle never hurt, right? YUM!

Ok...go ahead and pour the remaining batter into the muffins, making EXTRA sure that you cover our little cream cheese block friends up. Once this is done, I sprinkle them with just a tiny bit of sweetener on top, just like my mom used to do.

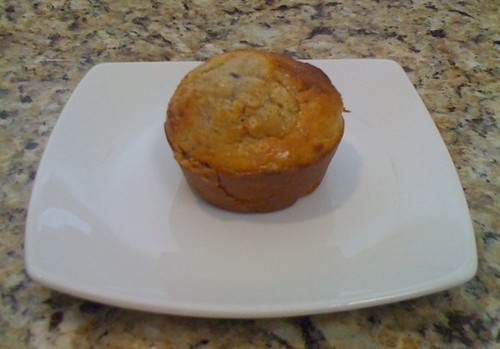
Bake for about 18 minutes at 350 degrees. Keep and eye on them - they cook much faster than a traditional muffin. Mine looked pretty well done at about 14 minutes in, but I let them go a bit longer to be sure (the old insert a cake tester works well until you hit the cream cheese blob).

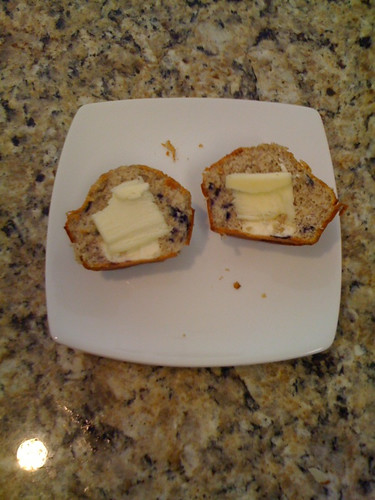
Now..remember...these are a low carb baked good with no flour of any kind. They will be a little different in texture than a traditional muffin, but still taste great! You'll want a nice, big glass of water to have with these because of all the protein powder. These are a power packed breakfast!

Nutritional Data (per muffin):

Carbs: 5.1 g total, 4.7g net
Protein: 16.5g
Fat: 15.7g
Fiber: .4g
Calories: 225

9% of calories from carbs, 29% from protein, and 62% from fat
***************************

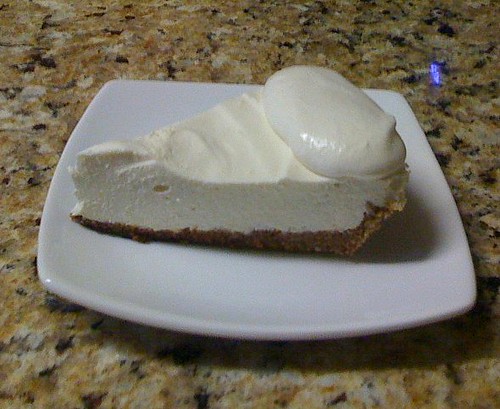
Everyone loves the "take out" scenes, right? One of these things is not like the other, one of these things just doesn't belong.... LOL

Thursday, August 12, 2010

Sugar free, gluten free - chocolate cake balls

Oh yes. You heard me right. Tonight is your lucky night.

I'd like to present you you the most decadent, chocolatey, rich, cakey dessert on a stick - The Low Carb Chocolate Cake ball!

This is a modified recipe from Healthy Indulgences


*********************

Low Carb Chocolate Cake Balls

For the cake:

Ingredients:
1-15 ounce can of unseasoned black beans
5 large eggs
1 tablespoon pure vanilla extract
1/2 teaspoon sea salt
6 tablespoons unsalted organic butter
1 cup Splenda (or whatever sweetener you like - I use Ideal)
6 tablespoons unsweetened cocoa powder
1 teaspoon aluminum-free baking powder
1/2 teaspoon baking soda

Preparation:
Preheat oven to 325 degrees Fahrenheit. Spray a small jelly roll cake pan with extra virgin olive oil cooking spray, or just grease it with a thin layer of butter.

Drain and rinse beans in a strainer or colander. Shake off excess water. Place beans, 3 of the eggs, vanilla, and salt into blender. Blend on high until beans are completely liquefied. No lumps! Whisk together cocoa powder, baking soda, and baking powder. Beat butter with sweetener until light and fluffy. Add remaining two eggs, beating for a minute after each addition. Pour bean batter into egg mixture and mix. Finally, stir in cocoa powder and water (if using), and beat the batter on high for one minute, until smooth. Scrape batter into pan and smooth the top. Grip pan firmly by the edges and rap it on the counter a few times to pop any air bubbles.

Bake at 325 for about 20 minutes, until a cake tester inserted in to the middle of the cake comes out clean.


For the Cream Cheese Frosting:

Ingredients:
1 8oz package of cream cheese
1 teaspoon pure vanilla extract
1/2 stick of butter
1/2 cup sweetener, powdered

Preparation:
Set cream cheese and butter out on the counter to soften and come to room temperature. 

Once softened, add to a bowl, and beat with a mixer until fully combined. Add in vanilla and your powdered sweetener, and mix completely. Knock down the sides of the bowl to make sure everything is completely combined. 

If you do not have powdered sweetener (this is not the same as granulated!), add 1/2 cup of your sweetener into a spice/coffee grinder or food processor and blend until it is like powdered sugar. 


Making Cake Balls

Once the cake is out of the oven, set it on a wire rack to cool for about 20 minutes. You want the cake to remain slightly warm to the touch, but not hot. Remove the cake from the jelly roll pan, and crumble it up (yes...smash up your cake) into a large bowl.

Take your cream cheese frosting, and dump it into the bowl as well.

You should have something looking like this:


Combine the cake and frosting completely.It'll look like a thick, gooey, wonderful pile of chocolate. 

Put the "dough" into the fridge and let it chill for at least 30 minutes. You'll want it to firm up a bit so that you can roll it into balls.

Once the dough is chilled, you're ready to roll (HA! Get it? Ready to roll?!)

Get out a sheet pan and line it with a piece of parchment paper. Take tablespoon sized scoops and roll them into balls. You should get approximately 24 or so out of this recipe if you don't eat too much while you are making them.

Once all the balls are rolled out, set the sheet pan into the fridge and let them set another 30 minutes. Once set up, take small sticks (like popsicle sticks, but slightly smaller - you can get these at the grocery store, craft store, etc) and insert them into each ball.

You can stop here, or you can melt down some chocolate (dark, of course) and drizzle over the tops. You can also roll them in your favorite nuts. 

However you decide to finish them, they are SURE to be a hit!

Food for August 12

Here is what's on the menu for today!
29.5 g net carbs, 1629 calories

My lunch salad includes 1 cup of red leaf lettuce, 1 cup of spinach, cucumber, red and green bell peppers, black olives, tomato, cheddar cheese, hard boiled egg, and balsamic vinaigrette dressing. It's in recipe form to keep me from having to add things multiple times.

Dinner we're having a "treat" side - broccoli cheese rice casserole. I steam broccoli, and make a cheese sauce using American and cheddar cheese melted with a little heavy cream. Usually we have it this way without the rice, but Brandon has been asking for it with rice..so tonight I will mix 1/2 cup COOKED brown rice into it.

Once I make the ribs, I'll need to adjust slightly for the sauce. Probably will add about 4 more carbs, but not tooooo too bad. I'm also not sure if I'll end up eating the key lime pie tonight. I'm not feeling well and probably won't be hungry enough for it. We'll see.

I've been staring at the Granny Smith apple on my desk all darn day. It was a leftover from my caramel and chocolate covered apple experiment the other day (no, I didn't eat any...I just wanted to make them). I sent them to work with my husband. I'm going to make some more this weekend probably. I miss baking and doing this sort of thing, so even though I can't enjoy them, I do enjoy making them! I'll spare my fellow low carbers the torture of a photo. Anyway...I digress. I won against the apple. We'll see who wins tomorrow ;)

Breakfast Smoothies (or "ice cream" for later)

This is one of my most favorite low carb treats. It's not super low carb, but it's perfectly fine for those who are in later phases of their chosen plans or in maintenance.

I used to buy fresh berries and then freeze them on a cookie sheet. Once frozen (or nearly frozen), I'd transfer them into bags. You know what? Berries are EXPENSIVE. I'll get fresh when on sale, but otherwise, I've moved on to getting frozen berries. Sometimes it can be a little tricky to find unsweetened frozen berries, but one of my local chain stores does carry them (and even has organic varieties!).

I'll alternate between raspberry (my favorite), blackberry, or triple berry - raspberry, blackberry, and blueberry. Sometimes I'll mix them. Sometimes I'll have a smoothie. Sometimes I'll save this for at night and have ice cream. And sometimes, I'll even make popsicles out of this! Very easy base for some really tasty treats!

***************************

Berry Ice Cream/Smoothies/Popsicles

Ingredients


  • 1 cup frozen berries

  • 1/4 cup heavy cream

  • sweetener to taste

  • (optional) 1 scoop protein powder (I use Optimum Nutrition Any Whey)

Prep:

Place frozen berries in a food processor (I use my mini prep processor. If you have a large food processor, I'd recommend using the smaller work bowl fitted with the smaller steel blade). Pulse until you have a bowl full of small crumbles.

Add in your sweetener (you can use whatever you like. My sweetener of choice is called Ideal, and is xylitol based). I generally use 2 teaspoons. If you are using any protein powder, now would be the time to add it in. This is an EASY way to incorporate some extra protein into your diet if you're lacking in that department. The Any Whey protein I use is really tasteless. I'll be posting up PLENTY more recipes for you to use this in as this blog continues. :)

Once your sweetener and whey powder is added, give this a few pulses.

Next, add in your heavy cream. Start with a few short pulses, to get this started. After about 10, you can leave your processor in the on setting while this blends. You may need to stop it and knock down the sides. If the mixture is too thick, add a touch more cream. After everything incorporates, this will be the consistency of soft serve ice cream.


Now - if you are wanting ice cream, you can stop here! This will be more than enough for 2 servings, so share it with someone. :) If you'd like to make popsicles, simply spoon this into molds! I like to make 2 batches and make layered pops with raspberry and blackberry! YUM! This will freeze solid, so unfortunately you can't really keep any of your leftover ice cream unless it's in pop form.

If you want to make this into a smoothie, simply add a bit of water to thin it out enough for it to go through a straw. Easy as pie!


This makes a LOT of smoothie. A party cup sized smoothie. This is for sure a meal replacement type item and not just a snack. One of these will keep me full and happy until it's time for lunch.

Nutritional breakdown (including whey powder):

Carbs - 18.2g (Net Carbs - 10.1g)
Protein - 19.7g
Fat - 22.8g
Fiber - 8.1 g
Calories - 338

Wednesday, August 11, 2010

Food for August 11

I'm going to try and be good about logging my food for the day. "What do you eat" is one of the most common questions I get. This will be another way to keep me accountable for what I'm having, as well as answer the question I get asked time and time again. So...here is today's list, complete with all counts and macro percentages!

24.6 g carbs (net), 1677 calories

Glorious Key Lime Pie

My hands down favorite dessert of all time is key lime pie. I *love* it.

I found a recipe that I had to try, from one of my most favorite blogs: Healthy Indulgences 

At first, I was weary. I have tried MANY supposed key lime pie recipes since starting low carb, and never found anything even REMOTELY close to how this tastes. NOTHING. This was to die for good. No funny sweetner taste, no hint of it not being an authentic carb filled dessert. Just silky, smooth, key lime-y goodness on a nut crust that I just so happened to really like (and let me tell you, I do not like nut crusts!).

Here is the recipe. Again, I cannot claim this as my own, but I am posting it here for ease of finding it. :)


******************************

Healthy Key Lime Pie


Makes 8 servings


Ingredients:

  
For Crust:

  • 1 cup blanched almond meal, packed
  • 1/2 cup pecan meal, packed
  • 1/2 tsp. cinnamon
  • 1/8 tsp. NuNaturals pure stevia extract
  • 2 tsbp. granular erythritol, powdered
  • ½ tsp. xanthan gum
  • 3 tbsp. butter, melted
  • ½ tsp. vanilla
  • 1/8 tsp. salt


 For Filling:

  • 8 oz. cream cheese, softened
  • 7 tbsp. granular erythritol (or other sugar substitute), powdered
  • 1/4 plus 1/8 tsp. NuNaturals pure stevia extract
  • 1/2 cup key lime juice (the bottled kind works well)
  • 1/4 tsp. finely minced lime zest (1/8 tsp. for less tartness)
  • 1 packet (2 tsp.) unflavored gelatin
  • 1 cup heavy cream

Preparation:

For Crust:

Preheat oven to 350 degrees Fahrenheit.

Whisk together almond meal, pecan meal, cinnamon, stevia, and xanthan gum together in a bowl. Grind erythritol in a coffee grinder to powder it. Whisk into the above mixture. Stir vanilla and salt into melted butter. Add to dry mixture, and knead together dough with hands until everything is distributed evenly throughout the dough. The color of the dough will look even when its ready. Lightly grease a large glass pie dish with butter. Press dough into dish in the shape of a crust, trying to make sure that the thickness is the same all over the pie dish. Poke holes with a fork all over the crust so to ensure that air pockets don't form while it's baking. Bake crust for 14-15 minutes. Make sure to remove crust from the oven once edges are slightly browned. Check the crust a couple of times while it bakes to see if bubbles form. Should you see air pockets rising under the crust, open the oven door, and gently prick those areas with your fork. Place dish on a cooling rack to cool, and wait at least 2 hours for crust to dry out and reach room temperature. You can cover the crust with plastic wrap, and store it in the refrigerator overnight if you'd like to prepare the filling the next day.

For Filling:

Set cream cheese out on the counter for 2 hours to reach room temperature.

Beat cream cheese with a mixer until smooth and free of lumps. Powder erythritol in coffee grinder. Stir erythritol and 1/4 tsp. stevia into cream cheese, then beat with mixer for 2-3 minutes on high speed to ensure erythritol has dissolved and texture is smooth. Refrigerate mixture while you perform the next step.

Heat key lime juice, covered, in microwave on HIGH for 2 minutes. Add lime zest to hot key lime juice. Whisk gelatin into key lime juice until it has completely dissolved. Let mixture cool for 5-10 minutes, or until no longer hot to the touch. Stir key lime juice mixture into cream cheese mixture. You want the gelatin to start thickening as it cools down. Look for a pudding-like texture as you are stirring the cream cheese mixture around the bowl. If it is not thickening, make an ice bath with another bowl filled with ice and water. Set bowl with cream cheese mixture over the ice bath (making sure water doesn't get into cream cheese mixture!) and stir the cream cheese mixture around bottom of bowl with a spatula. Do this for a couple of minutes until the mixture thickens to a pudding-like consistency and is cool to the touch. Remove bowl with cream cheese mixture from ice bath, and set aside.

In a separate bowl, beat heavy cream and 1/8 tsp. stevia until stiff peaks form. Use spatula to fold a dollop of whipped cream mixture into cream cheese mixture, and stir it around a bit. Fold the rest of the whipped cream into cream cheese mixture until texture is fairly even. Scrape filling into pie crust. Refrigerate pie, uncovered, for 3-4 hours, or until texture is firm enough to cut. Serve topped with whipped cream if desired. Pie will keep at least 3 days refrigerated.

Use the same process to whip cream for garnish as you did above for the filling. Add erythritol, stevia, and vanilla extract to taste. If you don't mind a few extra carbs, you can use a little bit of the canned whipped cream.

 *****************************
According to my calculations, this should be roughly 6.125g of carbs per slice. And let me say this - this makes 8 LARGE slices of pie. These aren't "diet" sized pieces. These are "I'm going out to eat and I better get a damn big piece of pie for $8" sized slices!

Try this. It will NOT disappoint!

The Journey!

Ok kids...buckle up. This will be a LONG posting, but it'll get everyone up to speed.

Let's start with the photo that mortified me for months. Ok, ok, ok. It still does.
Brandon and I last spring. Big, tubby, gross...and miserable. I was at my heaviest here. I was about 260lbs, a size 20W in pants, and XXL or 18/20 in tops. Ugh. This depresses me now, but it was so much worse when I was still "there".

In September of last year, I was home for a few days to get together with some friends in New Hampshire. People I had never met in person, mind you, but that I have "known" for years. People I knew through a French Bulldog website and through the French Bulldog Rescues I volunteer for. I was really excited to be, but was about *this* close away from an anxiety attack because I just hated everything about myself. I was about 15lbs down from my heaviest weight above when I went there. The photos from the get together were really what set the ball into motion that something, ANYthing, had to be done (I know, the first photo should've been more than enough).

On October 26, 2009, Brandon and I set out to make lifestyle changes. Not go on a diet, but to change the way we live and eat day to day. This wasn't something that we could fail - this was FOR GOOD. We began living the low carb lifestyle by following Atkins. Atkins can be such a dirty word - people don't understand what the plan actually is. People have their ideas - eating bacon, eggs, and cheese until you can't eat anymore - that's not what this is. It's about cutting out sugar, grains, and other carbs from your life and replacing them with vegetables, low GI fruit, dairy, and other natural foods. No processed anything is allowed. Consume healthy fats, eliminate the bad ones. But, I'm not going to ramble about the plan here. Not the time or place, you see ;)

I'm not sure why, but I didn't take a photo in November. Oh well. So...we start in December! Here I am, down about 27lbs, and in between 18s and 16s.

On December 30, I managed to hit my first goal, which was to be under 200.

This brings us to January! Here is -45 lbs, and in a 14/16. Showing off some old pants ;)


February. -55lbs, or a 12/14


March brings us to -60lbs and a size 12


April finds me at -70lbs and in a size 10

Ah, May. -75lbs, and in my first size 8.

June is -75lbs, now all 8s.

July brings me to -80lbs...still an 8

And finally...to today. Well, not today today, but this was from Saturday. August. -85ish lbs. Still a size 8, but they're getting bigger. ;)

Ok. So now we are to current day. WHEW.

So...lots of changes made, lots of good results. On my way to more.